


Retaining Wall Castings
The Riverside station ended up with a very abrupt two-inch change in elevation from the track to the edge of the river, with no room for even an exaggerated slope. My solution was to mimic the stone and concrete retaining walls of the original station I’m using as inspiration. These are large stone blocks on a fairly steep slope, capped and boxed in with concrete (which was probably a later addition to improve the walls resistance to earthquakes; many of the older railroad structures around Tokyo station were brick or stone block, but few survived the 1923 Great Kantō earthquake). You can see a photo of the look I was going for on the Station Contest page.
To do this, I needed about 18 inches (46 cm) of level wall, and over two feet (60 cm) of wall that sloped down at a 2% grade to match the track. I decided this was a good opportunity to learn how to make latex molds and cast plaster.
Making the Master Pattern
First, a master pattern has to be constructed. This will be used to create the latex mold, which will then be used to cast the plaster wall sections. I started with the level section, as I needed two 23cm sections that were relatively simple, and this would give me some practice before constructing the one I’d use to make the sloped sections, which was going to be more precise in its measurements.
The master pattern was made from strip and sheet styrene, cut to shape and glued into a three-dimensional structure in the form I eventually wanted the plaster to take. I used the following styrene for this:
Styrene:
0.040 (1 mm) sheet - Evergreen 9040 (pillars, walls)
0.030 (0.75 mm) x 0.250 (6.3 mm) strip - Evergreen 139 (sides, reinforcement)
0.100 (2.5 mm) U-channel - Evergreen 263 (upper lip)
0.020 (0.5 mm) x 0.156 (4 mm) strip - Evergreen 127 (hidden reinforcement)
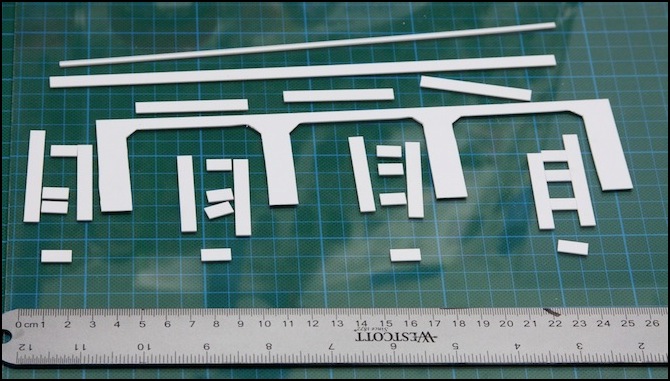
Styrene cut to shape
I cut out the styrene, using a sheet of 1 mm stock for the main pillars and cap. The sections removed from the archways would later be reused as the sloped walls. I used the green cutting board, and a styrene scribing tool to score the plastic (about a dozen passes per line), then snapped it clean off along the scribed line using the ruler. The photo above shows the cutting mat with a sheet of glass (from a picture frame) laid atop it. This glass provided a level work surface that glue wouldn’t adhere to easily, which made keeping the structure flat while gluing it together much easier.

Initial box structure, with tools
I glued the strips into box structures for each pillar, as well as a cap along the top (which used a bit of channel section to create a lip at the front). For tools, I mostly used the pliers to position pieces, and the foam nails to apply glue (these work well, as you can pull out a fresh one each time, and later when the glue has dried, any residue can be pulled off the nail with a fingernail).
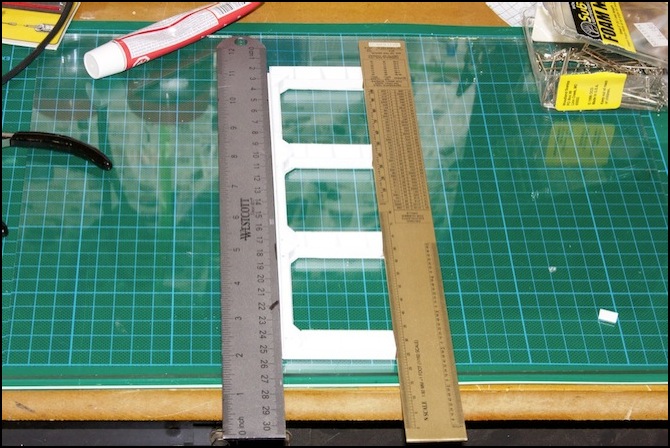
Checking level
After the boxes had set, I glued them to the pillars, and added top top pieces, at various times I checked the structure with rulers to ensure it remained square.
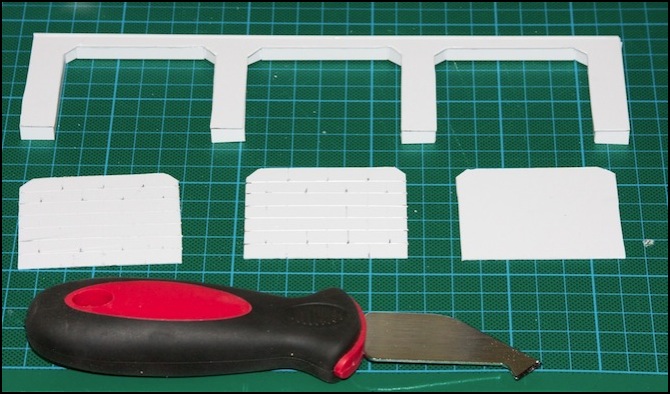
Blocks, Pillars, and scribing tool
The above photo shows the scribing tool I used, as well as the mostly-completed pillar assembly, and the faces. I used the tool to scribe lines on the faces approximating the blocks, then roughed up the styrene with vertical passes of 100-grit sandpaper, and then finally smoothed it using 220-grit paper. This created a faint texture, in contrast to the pillars which were left smooth. Then I glued the block faces into the gaps, but at an angle, so the base was level with the front, and the top was nearly level with the back. I put a couple of layers of styrene behind the top, so that the eventual plaster there would have enough thickness (I hope) to be solid.
The final structure was a rectangle about 1/4-inch thick, and just as high (2-inches, 5cm) as the foam that would go behind it, and 23cm long.

Checking fit
After the glue had dried (overnight) I test-fit the wall to the two places I intend to use the casting. It fit as designed, although I discovered the left side wasn’t actually a straight line (something I’d overlooked) and I’d either need to curve the wall to fit (which might be possible before the plaster fully cures) or remove some foam to make a straight line (which is probably more reasonable).
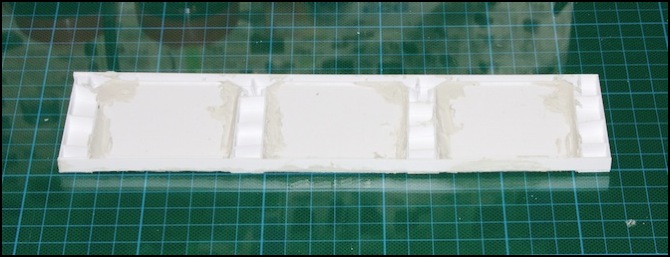
Gap filling
When I had glued in the front faces, the edges hadn’t quite met up. I had tried to fill the gaps with some plastic strip, but there were some odd corners that didn’t close up. In the end, I used modeling putty to fill the gaps, but this may have been a mistake. The modeling putty used was solvent-based (Toluene; nasty stuff, and the same stuff that glue uses, although I didn’t realize that until later).
After all this (several days of cutting, careful gluing, and watching glue dry), when I checked the structure the day after I applied the putty, the shape had actually distorted, lifting the base at one end 2mm up from level. It’s small enough that it probably won’t be noticeable in the final structure, but definitely a lesson learned. I’m pretty sure the solvent in the putty was at fault.
After this, I sanded down any rough spots, then I glued the structure to a sheet of 2mm plastic about 2cm wider on each side than the structure, to serve as a flange when the latex was applied, and to give me something I could tape to the glass to keep it from moving about while I painted it with latex.
The Latex Mold
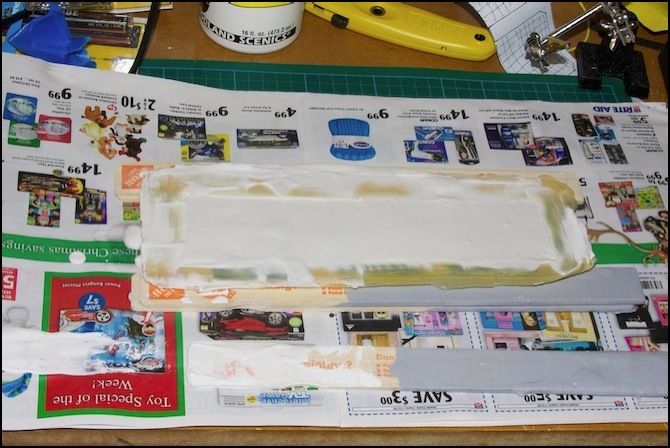
I used Woodland Scenics latex rubber to make the mold. You do this by painting several coats on (use a cheap disposable bristle brush). The first needs to be very thin, so bubbles will not form against the master (some people recommend applying a mold release to the master first, such as fine talcum powder or soapy water; I didn’t do this).
BTW, latex should be used in a well-ventilated area, and not somewhere you want to spend time. While drying it releases ammonia, which smells quite strongly and can make your eyes water even from a relatively brief exposure.
Fresh latex is thick, creamy and opaque. Once dried, it becomes thinner and mostly transparent. It can appear dry, while still being wet, and attempting to remove it from the master too soon can damage it. WS says each layer should dry overnight (latex is water-based, and the water has to evaporate, which isn’t fast), but others have said that you don’t need to wait that long between coats, just after the final coat.
If the first coat is thin, and it should be to minimize the risk of bubbles on the face of the mold, a second coat can be applied after an hour or two. It’s also a good idea to pop any bubbles that do form (I used another Woodland Scenics foam nail for this). I did a thin coat followed about four hours later by a thick one, and then eight hours later (the next morning) by an even thicker one. By evening, it was dry to the touch. Even with all these coats, it was still essentially transparent, as seen below.
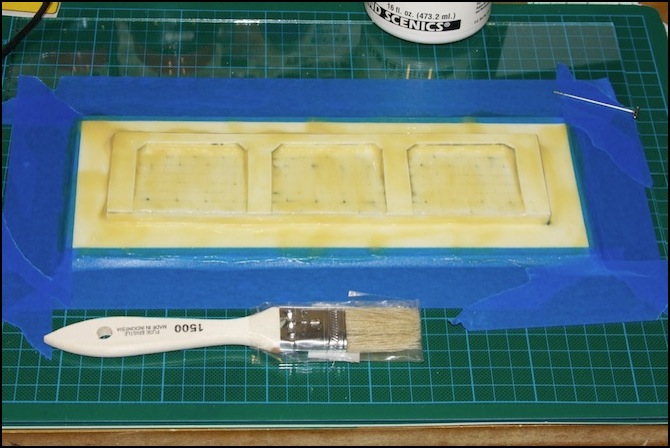
Latex with three coats, dried (with $0.79 disposable brush)
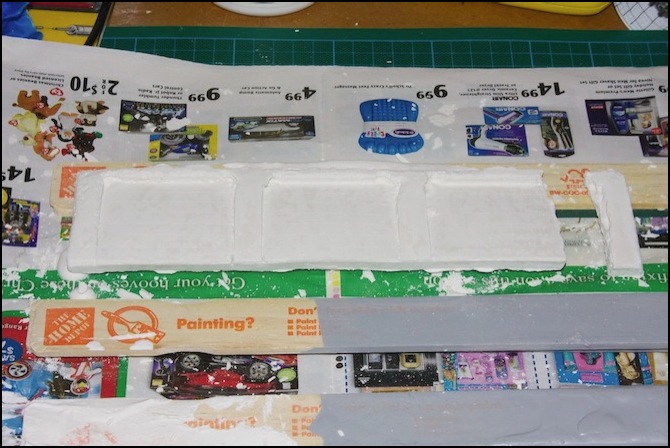
After several coats, a layer of material should be applied atop one coat and another coat applied over it. This can be any reasonably porous material with some strength to it. Among the substances I read of are gauze bandages, disposable dryer anti-static cloths, glass-fiber tape, and handi-wipes. I’d originally planned to use gauze, but handi-wipes, once I’d read of others using them, seemed like an easier, and stronger, material to work with. I cut out three small pieces to fit inside the archways, and one long strip to cover them. Then I painted on a later of latex, set the small pieces atop it and smoothed them down with gloved fingertips so that the latex soaked through. Then I painted a second layer atop them (immediately), added the long strip, and painted more latex atop it.
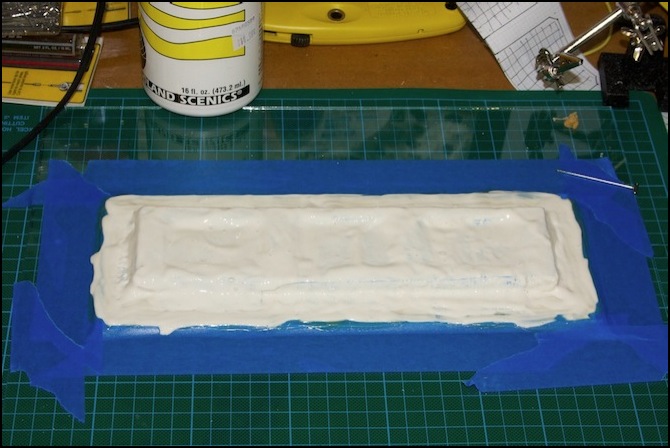
Handiwipes (the blue tint just showing through in a few places) and fresh latex
This I let dry for 24 hours, which wasn’t enough. A full day later and the latex was still a bit tacky to the touch. I gave it another day, and while one corner of the flange still felt tacky, the rest seemed firm, so I decided to gamble on it being dry. It was.
The latex had some rough corners where it had fit down into cracks in the master that I hadn’t managed to fill, and a few small bits had torn when trying to remove those from the master, which suggests I need to do a better job of removing those cracks before I put latex down, but it peeled off the master quite easily otherwise.
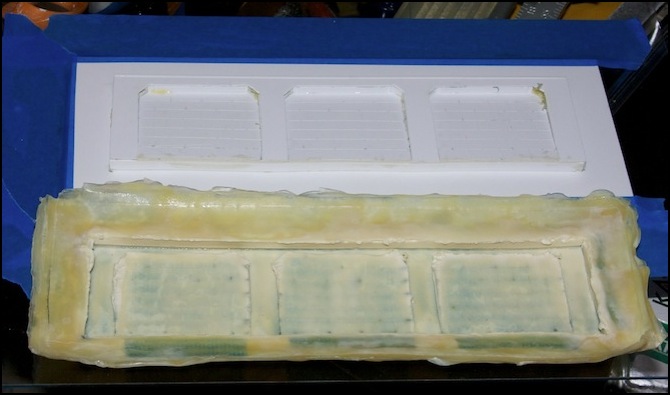
Master and Mold, after separation
Casting Lightweight Hydrocal
All of this work has been to create a mold so I can cast Woodland Scenics Lightweight Hydrocal (which I’m just going to call plaster from now on) in the form of a retaining wall. Lightweight Hydrocal is just a form of plaster with fine grain structure, and additives that make the result about half the weight of normal plaster of paris. It’s also reportedly harder, and not as prone to chipping or flaking. There are other similar materials, like dental casting plaster, and you can buy Hydrocal (not sure about Lightweight Hydrocal) from some builder’s supply firms, although not the usual big-box home supply stores I tend to visit.
I checked the volume of the mold by pouring water into it, then into a measuring cup. This also left the mold wet, which makes it a bit less prone to form surface bubbles. Some people recommend using “wet water”, which is water with a drop of dish detergent in it, or PAM as a mold release, others argue against the practice.
The volume of the mold was a bit less than one cup, so I mixed the 1 1/4 cup of hydrocal to 1 cup of water suggested on the package. Contrary to the instructions I stirred it a bit initially to mix the water and powder (otherwise the powder just floated atop the water), then let it set two minutes before stirring for one, as directed. It’s important to stir gently, as you don’t want to create bubbles in the plaster.
One interesting additive I’ve read about, but not used, is to add a bit of soap or Lysol to the plaster when mixing, as this reduces surface tension and makes it work better with fine detail. I don’t really have fine detail this time, but I’ll remember that for the future.
One thing I read after this was to tap the mixing bowl when done stirring, to release bubbles that may have formed. Also using fingers to break up any chunks during the mixing stage. I didn’t do either.
In any event, the result of my mixing poured readily into the mold, and I used a wooden paint-stirring stick to smooth out the upper surface, and apply pressure to force plaster into the corners of the mold.
I had a bit of plaster left over, which I dumped in the trash, and cleaned my mixing bowl with a paper towel before the residue could dry. Never put this stuff down a drain, or even wash out the bowl; it can gum up pipes something fierce.
Now it just has to sit long enough to set up. WS says you can release it from the mold in a matter of hours “or overnight”, since I need it to survive the removal of the mold, which would have to be peeled off some of the details, I waited the full 24 hours.
First try, top left with significant bubbles and very brittle
The end result was disappointing. Some bubbles had apparently formed in the mold, which not only left part of the casting quite rough, it also made sections very brittle, and they crumbled easily. I discarded the first casting and started over. Since it was scrap, I deliberately broke off the right end to see how strong it was. The answer, moderately strong, but more delicate than I’d expected from past use of Plaster of Paris.
For the second casting, I was careful to stir very gently (although there still seemed to be lots of air in the plaster, and I also gave the mold a light spray of “wet water” (water with a small amount of disk soap in it to break the surface tension) then shook most of the water off, and poured the plaster into the damp mold. Once poured, I used a small strip of cereal-box cardboard to probe the plaster, to ensure no large bubbles were in the corners, I then let that one sit another 24 hours before I removed it from the mold.
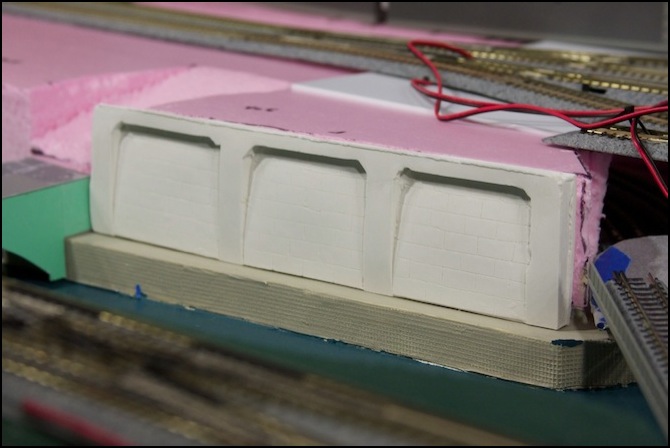
Second attempt - unpainted
The second one came out much better. I scribed out the lines of the stone blocks a bit with my styrene scribing tool, to make them more obvious. The plaster of the blocks had a bit of a curve to it, where the mold had sagged (I’d tried to minimize this will some bracing under the mold, but clearly not enough). The photo above shows it posed in place. I cleaned up the edges with a file and sandpaper to remove any roughness from the back of the mold, and sanded the bask (against a sheet of sandpaper wrapped around a board) to make it smooth for eventual gluing to the scenery.
Then I pained it, using Woodland Scenics Gray Stone for the blocks, Concrete for the pillars, and Burnt Umber dry-brushed on the blocks vertically for rust streaking (hard to see in the photo, but it came out fairly well). I also dry brushed some black ink, thinned 50/50 with water, on the vertical pillars to give them some texture, but I wasn’t very satisfied with the result.
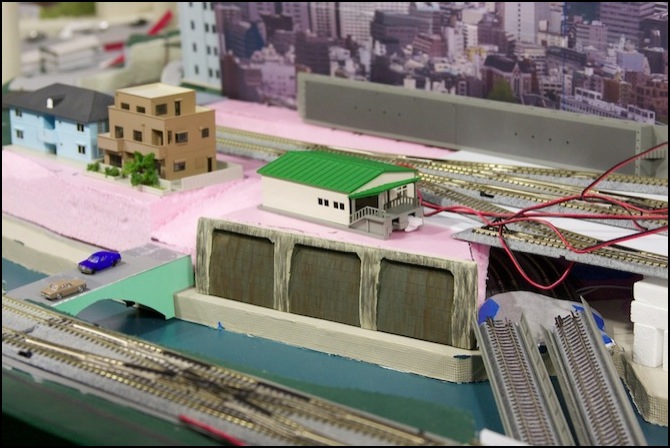
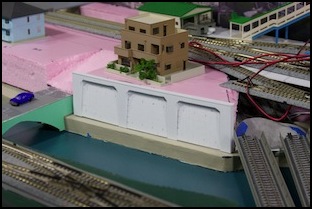
Painted Retaining Wall #1
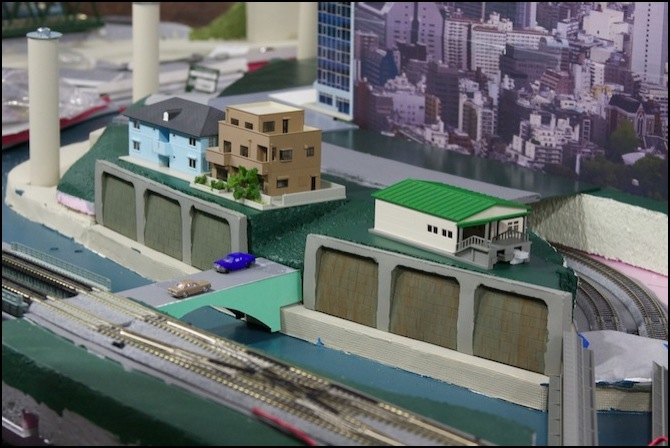
My third casting (wall #2, to be placed to the left of the automobile bridge in the photo above) came out equally well, and has been painted. I wasn’t satisfied with with the yellowish concrete and black streaking, so I repainted the pillars of both using Tamiya “Flat Neutral Gray” acrylic paint, which looks better. I omitted the dry-brushed “rust streaks” from one of the walls, as it didn’t seem quite appropriate for this location (no track above it to rust), but the result is a bit bland.
I’ve also painted the foam and glued it down, and I’m getting ready to glue the retaining walls to it, once I decide what the final painted color should be.

Retaining Wall #2, without rust streaks
Retaining Wall #1, with rust streaks
