


Urban Station
The first building to be done will be the Urban Station, because unlike the others this will be a permanent (or semi-permanent) part of the layout. This station is at the end of the layout where the ground level drops, andit serves as a base for the track overhead, and needs to be used to route track, detector and signal wiring down through the table.
About the Model
Although I’m using Tomix FineTrack for this layout, the station building (as many of the other buildings) is a Kato ready-built structure, which doesn’t matter since the upper surface is just flat; you can put any kind of track on it. It comes with simple stick-on signs, and is cast in plastic of a couple of different colors, but I’m going to do a bit more detailing, including paint and interior lighting.
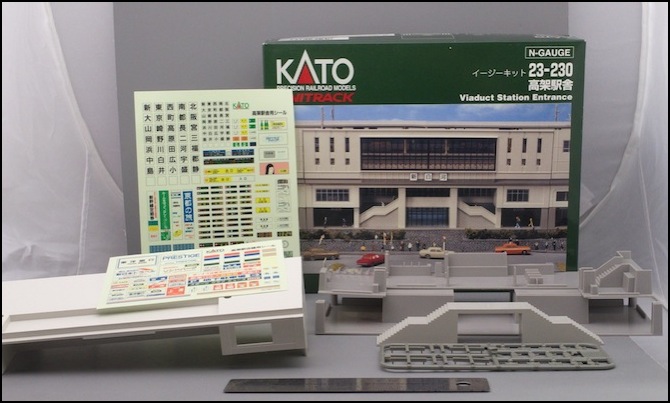
You can buy this structure as part of a larger Viaduct Station set (23-125) for US$89, allowing construction of an elevated viaduct 1,240mm (48.8”) long and 110mm (4 5/16”) wide. This contains a total of five sections of 248mm viaduct along with buildings to fill the area under three of them (it includes four support piers to hold up the rest). That’s more than I need, so I’m using the basic Viaduct Station Entrance building (set 23-230) US$38 with one overhead section 248mm long (9 3/4”) and one identical add-on Viaduct Station Stores (23-231), US$36, which contains two 124mm (4 7/8”) buildings and a second length of overhead platform. I’ll use the platform, but only one of the two “Shops” buildings (the other will eventually get used on the main layout).
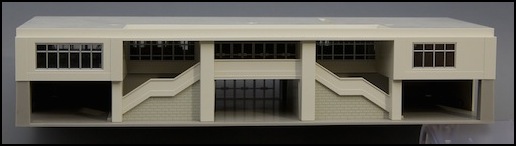
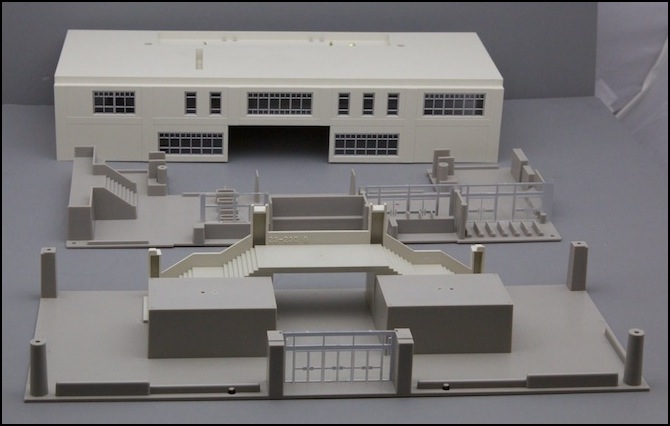
Entrance and shops, front view
Both buildings are two-story structures, with a base with molded detail, and insert forming the second floor, also with molded detail, and a roof/walls casting.
For the shops the small upstairs front windows and recessed downstairs windows make any interior detail very hard to see. In fact, the rear windows are so tiny that the detail (top of center section in the image further down the page) might as well not be there; it’s impossible to see. Lighting the shops is necessary for consistency of appearance, but it isn’t going to provide much other benefit. I will do a little detailing though (people near the front windows, some interior paint, etc).

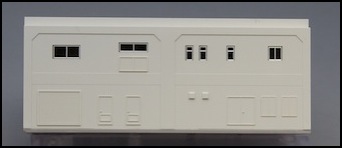
Station Shops: rear view
The entrance building is more interesting, at least upstairs. It’s totally lacking in detail on the lower level although I may be able to add something appropriate, but upstairs is a molded waiting room, ticket counter, entrance turnstiles and platform stairs. The stairs are at the far right and are a bit odd, since they lead into the adjacent building which has no matching structure, although there is an area at one end that can be made to appear as one, more on that later. But since it’s nearly impossible to see inside the shops’ upper floor, that’s not a major problem.
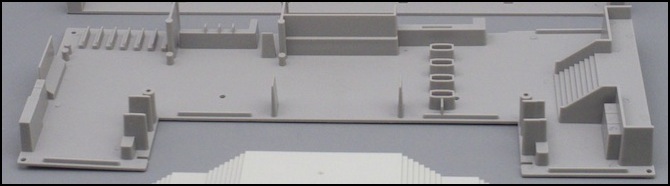
Station Upper Level Floor
I’m going to need to modify the structure slightly. Both buildings will be lit on both floors, so wires from upstairs need to be routed invisibly through the lower level. Further, the shops building will be used to run wires up to the track for power, track detection, signals and platform lighting. That’s a lot of wire, so I’m actually planning two separate wiring runs.
After getting ready to work on this structure, I took several months off from layout work, in part to wait for warm weather for painting. But it was also to think about how I wanted to light the interior. My first ideas didn’t seem right when I sat down to do them, so I let it stew for a while, and eventually sat down again with clearer ideas of what I wanted, and started planning the details.
Planning mostly took place at my work table, with a pad of paper, sketching out light/valence locations, and positioning for the elevator. That done, I got to work.
Construction Step 0: Prep Work
The first thing to do with any ready-built structure to be detailed is to take it apart, remove any bits not requires or able to be removed, and clean it. These buildings are held together with a few tiny phillips-head screws. The “glass” of the windows and doors are strips of clear plastic with silver window frames painted on, which unsnap easily (with a little care; bend too far and they’ll break or crease).
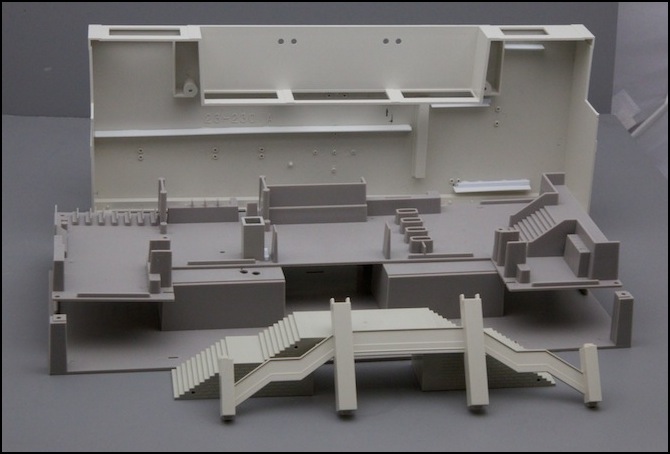
Disassembly: remove the two screws on the roof first, then pop it off and remove the six screws holding the middle in place
Mezzanine removed, here’s the view from the back of the building
Plastic kits come from the factory with various things on the plastic, including chemicals from the mold, dust and dirt, and even oils from people handling them. My first order of business, before making modifications, is to clean the surfaces in lukewarm soapy water with an old toothbrush, then rinse them, pat them dry with a clean towel and use compressed air to blow any water drops out of corners, and leave them to dry. The compressed-air step is necessary, else any dirt trapped in the water would simply be redeposited when it evaporated, leaving a tiny circle. It might not be noticeable, or a problem for paint, but best to be sure.
I’m actually doing this before I work on the structure so that I can clean them vigorously. Once I’ve added detail parts I’ll need another wash to get any hand oils and similar off, but that will be done gently to avoid knocking bits loose.
Step 1: Modifications
I need to drill a few holes for wire runs, and then add some valences (small walls on the ceiling that prevent the LEDs from being visible from outside).
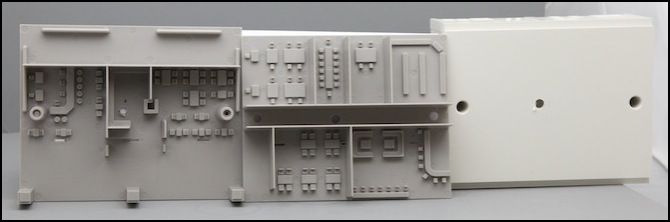
Shops Building with first wire run drilled (bottom is front of building; left is base, center is middle floor, right is top)
The first wire run for the “shops” building (above) is in the center, above the alcove that’s mostly hidden on the lower floor. I’m going to put an elevator shaft around the hole on the lower floor anyway, to ensure the wires stay out of sight, although with the small windows here that’s probably not necessary. Once drilled (using a battery-powered variable speed hand drill at very low speed) the holes are cleaned of flash and filed smooth. This first one is for interior lighting and lights mounted on the exterior of the station and shops buildings as well as under the viaduct (road lights).
A second one (not shown here) was drilled in the back section where it can’t be seen from outside. That one leads up to the platform and will be used for track and platform wiring.
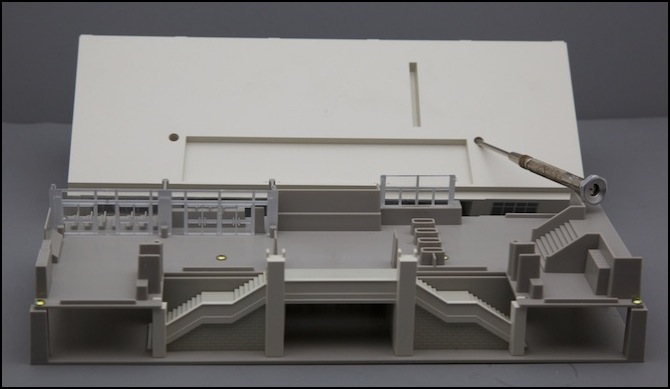
Station Building with elevator shaft and hole (left front), plus ceiling-mounted valences
To hide the wires in both buildings I’m creating conveniently-placed elevator shafts. When I do things, I live to have a reason, even if it’s just a little detail that might not be noticed. Real buildings of this type need elevators, and a boxy elevator shaft is very handy as a wire run.
After trying to make one out of strip styrene, I remembered why I don’t like making corners out of strip styrene. Discarding that avant-gard structure, I bought a length of Plastruct 3/8” (9.5mm) square tube and cut sections of appropriate length using a Zona hand saw and a mitre box. The photo above shows one mounted inside the main station, above a hole drilled in the base (two holes actually, the first was in the wrong place; measured twice, really, and still wrong). This will be used for lighting inside the upper level of the main station building.
In the main building, there is an elevator from ground level to the ticketing area, which is the one shown above. There’s also going to be a second on over by the stairs (past the turnstiles) to take people who can’t use the stairs up to platform level, but it won’t be used for wiring; it’s just a detail. In the shops building, the elevator hiding the wiring is only for customers to access the second level, and doesn’t go up to the platform.
Yes, my little plastic people have accessible buildings. Although a more recent innovation in Japan than in the U.S., access for mobility-impaired persons is now a feature of at least the larger and more modern stations. Kato has modeled platform elevators for newer stations, but this model, which is a relatively old design, did not have them.
