


Kato Viaduct Station
Kato’s Viaduct Station is sold as a set, as well as in individual components that can be used to extend the basic set into much larger structures. You could even build the whole station using only the expansions, although it would normally cost more (sometimes you can find individual sets at a significant discount, because they’ve been gathering dust in a store). The modular nature of the set provides a great deal of flexibility, allowing construction of a variety of different-size stations, with anywhere from two tracks with an island platform to multi-track stations rivaling the main Tōkyō station, provided you have the needed space (and money; the costs add up quickly for a large station).
The basic model reflects a typical (for Japan anyway) modern elevated urban station with an entrance and other buildings (retail shops) located beneath the viaduct carrying the trains. Although mostly assembled, the viaduct itself needs to be snapped together, including attaching sideways and windows in the sidewalls. And the buildings are screwed together and must be taken apart to add detail parts and stick-on signs. It’s not as “ready to plant” as newer Kato models. But that does make it easier to customize.
For information about Kato’s overhead track that connects to this station, see the Viaduct Track page.
Overview
The station comes as a main set, which lets you construct an overhead viaduct 49” (1.24m) long and two tracks plus a platform wide, connected to double-track viaduct at each end. This is wide enough for two tracks wrapping around a single island platform 992mm (39”) in length using two standard island platform sections and a pair of #4 (R248) curved ends. This is sufficient for a six-car train (an eight-car commuter train barely overhangs the ends, and might look okay). However the track plan (included in Kato’s instructions) calls for a R481 (18.9” radius) S-curve at each end. Kato’s Japanese trains (and probably their U.S. ones) can navigate this, but many U.S. prototype models from other manufacturers would not. To actually use the station, you’d probably need to make it double-width, which allows use of R718 (28 1/4”) curves or #6 switches to bring track around the platform. And you’d need to make it longer for the same length of train, since those curves don’t fit the basic length.
The model works much better if you’re building huge stations, on the order of 2-3 meters (6-10 feet) long, like my Urban Station. But it can be (and no doubt often is) used for shorter two-track stations supporting short trains.
The “viaduct” supplied with these sets differs from Kato’s Viaduct Track. The latter is a molded structure that exactly fits a single piece of track (double or single). The “viaduct” here is a flat slab 99mm x 248 mm (about 4” x 9 3/4”), with openings on all sides for S-joiners. These can be connected end-to-end and side-to-side in any combination. Sidewall panels that add about 5mm (0.2”) on each side are provided, and there are end-caps that plug spaces left when connecting viaduct, although many combinations will leave end gaps that can’t be plugged with the sizes and shapes provided. Within the area provided by the slab, ordinary Kato track and switches must be used (the wiring for the switches can be problematic, as no provision is made for getting it down to the table out-of-sight).
One oddity of the design is that while the viaduct can join to supports or other viaduct using the white S-Joiner connectors used for Kato’s viaduct track, nothing attached the buildings supporting the station viaduct plates to the plates. There’s an assumption that the viaduct is attached at both ends to ordinary viaduct track with support piers, which will keep the station viaduct from sliding out of place.
Use with Viaduct Track
Connecting this station to viaduct track is simple. A pier is used to support the viaduct section from the station and the viaduct track, and the three parts are held together with one or more S-Joiner clips. Then ordinary Unitrack is placed inside the station viaduct, and clipped to the end of track held in the viaduct, in the usual manner using Unijoiners.
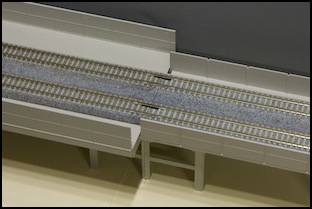
Double-track viaduct to station
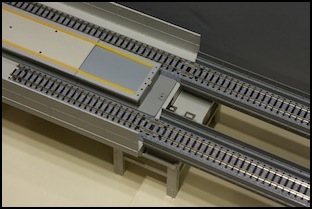
Single-track viaduct to station, right photo show use of end-caps on viaduct
Note: in the two parallel single-track viaduct example shown above, the viaduct attaches to the viaduct track with S-Joiners, but there’s no matching hole on the support, which is only connected directly to the station viaduct section.
Station Elements
Some of these are described as “unassembled kits”, but are just a snap-together and screw-together sets of elements that assemble fairly quickly.
Costs below are manufacturer’s list, expressed in U.S. dollars at a 100 yen/dollar rate (close to the current rate as I write this). Note that the set is a significant discount over the individual components.
Viaduct Station Set
The Viaduct Station is available as a set (23-125), US$89, allowing construction of an elevated viaduct 1,240mm (48.8”) long and 110mm (4 5/16”) wide. This contains a total of five sections of 248mm viaduct along with buildings to fill the area under three of them (it includes four support piers to hold up the rest).
- contains: Station Entrance (23-230), Station Stores (23-231) (qty 2), Extension Plate (23-232) (qty 1, containing two plates), plus four support piers
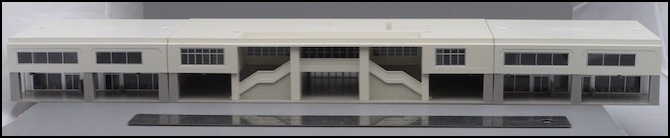
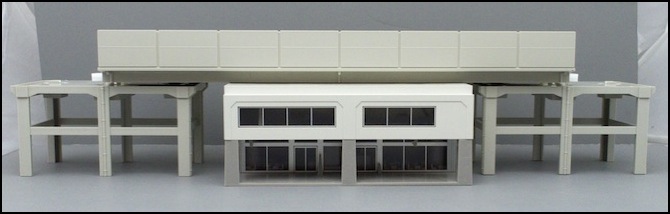
Station Entrance and Shops - front view

Station Entrance and Shops - rear view
Viaduct Station Entrance
The Viaduct Station Entrance (23-230), US$38: the under-the-viaduct entrance building from the basic set. You really don’t need a second one of these unless you’re building a huge station. This contains one building, depicting a two-story entrance with a lower-level shopping arcade and an upper-level ticketing mezzanine. It comes with a number of signboards (dark gray plastic in front of stairs in photo) that need to be attached, and stickers to place on them. It also includes the overhead viaduct with a section of wall having a large window area (with plastic windows) so that any platform (not included) on the viaduct can be seen from the side. Note the mezzanine-level stairs going up to the platforms (far right). These would appear to connect through an adjacent building, but neither of the shop buildings has space for these. Fortunately you can’t really see them from the outside anyway.
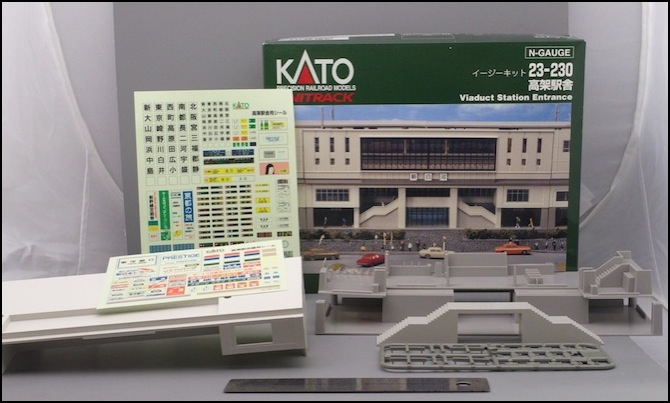
The Station Entrance - from the box

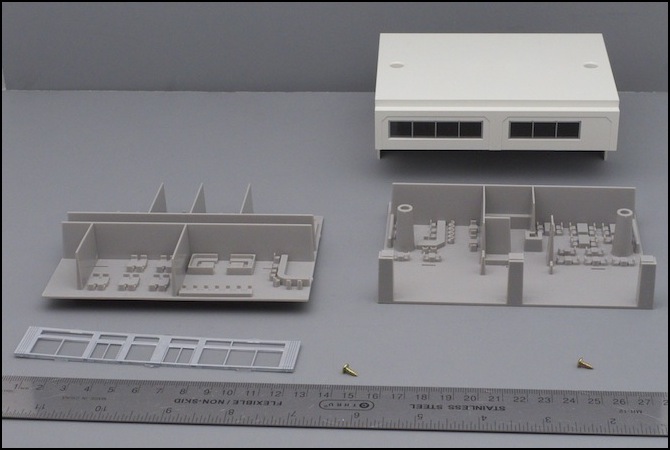
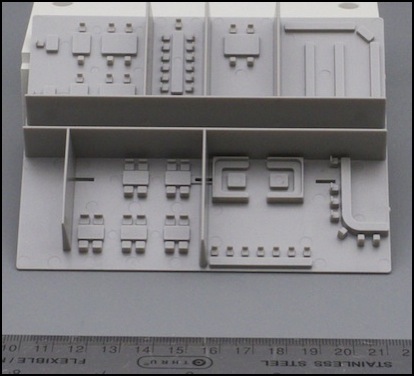
The main parts - stairs, upper level, lower level, outer shell
For a description of how I detailed one of these, see my Buildings of the One Point Five Meter Line page.
Viaduct Station Shops
The Viaduct Station Stores (23-231), US$36: the under-the-viaduct building containing stores, can be added to the one in the main set, or used on its own. Like the station entrance, this is an “unassembled kit”, but a very simple one. This contains one 248mm section of viaduct, and two identical 124mm long shops to fill the area under it.
The two shop buildings come with identical molded interiors that reflect dining establishments (and one small convenience-store or similar with display racks). Unlike the main station building, there are no separate parts to attach (signboards, etc), but there are stickers to use as signs that can be placed in windows in in the interior. On the upper floor the front and back shops are separated by a blind corridor, so you can’t see through from front to back and there’s space to run wires. On the lower level there’s a single wall, so you can’t see through, and wiring could be placed behind it, as there’s no windows on the lower portion, but it’s placed poorly for that. There’s also a somewhat hidden alcove in the middle that’s under the upper blind corridor, and works as a wiring run.
There’s one oddity to this kit: it almost looks like the upper floor was intended to be reversible, so you could have two different floorplans visible through the windows. But it’s not: the ground level windows need to fit into slots in the upper section, and there’s only one set, as seen in the photo below. What’s more, the windows on the back are so tiny (see photo of rear with station entrance up above) that the molded interior in the back is entirely wasted: it’s never going to be visible from outside. The interior partition doesn’t reach all the way to the ceiling, so lights in the front will cause the rear windows to light up also.
Shops - on left, upper level, on right lower level with body shell
Interior Upper Level - note slots on floor of front part
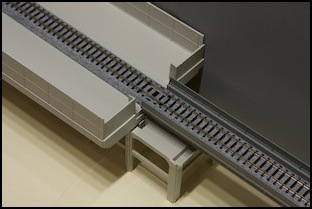
The photo below depicts one shop placed under ordinary viaduct. Normally two would fill the area under a section of the station viaduct. Note, nothing attached the overhead viaduct to the shops in either case; they only provide support.
Other Sets
Viaduct Platform Extension Set (23-232), US$23: a pair of 124mm x 248mm viaduct plates and sidewalls, for either lengthening or widening the viaduct supporting the passenger platforms.
Station Area Road Plates (23-411): part of the Diotown roadplate system (not compatible with the newer Unitram plates) and bus pulloff in front of a station, and can be used with either this Viaduct Station Set or the Double Track Plate Station House.
Station Area Road Expansion Plates (23-412): This can be used to extend the two-lane roadway at either end of the 23-411 set an additional 248mm.
Station Area Scenery Detail Parts (23-416): a large collection of detail parts (fence, signboards, railings, bus stands, etc) to add to the Station Area Road Plates.
Suburban Station Area Set (23-417): a set of small buildings to add to the Station Area road plats, including a public toilet for the park, and a couple of what look like stairway entrance covers.
DioTown Park and Parking Lot Set (23-418): just what it says; these fit onto spaces on the Station Area Road Plates.
