


Planning and Initial Roads
Also begun in April 2010, and continuing into June, was work on the bank of the wide river in the River Crossing scene that abuts the two other scenes. This was largely about planning the roads, as much of that bank will be taken up by the commercial avenue climbing up from the Urban Station scene, and then over a bridge to the Village area. A second road will branch off this and enter the Riverside Station scene, before crossing the canal there. Finally, above the bank and the road atop it runs the elevated Expressway. I wasn’t ready to build the final roads, so some of this work involved creating a temporary bridge and expressway to help me visualize the scenes and ensure I was going to like the result.
Paper Visualization
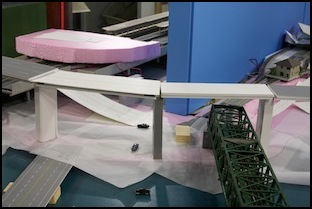
In the photos below, I’d mocked up the position of the road, expressway and bridges using heavy paper marked with a pen, as a first cut to see how it looked. The commercial avenue crosses the bridge from the village in the foreground of the left image, curves to the right and climbs the hill, then curves to the left and runs along the hilltop, before dropping back down to the Urban Station scene at the left rear. Where the highway crosses over the subway, there is a smaller road crossing the commuter tracks at grade (seen at the top of the right image) and from there leads down to the bridge across the canal, and above all is the elevated expressway. At this point the outer part of the river bank and most of the Riverside Station scene is still incomplete, leaving the gray roadbed of the subway tracks exposed to view.

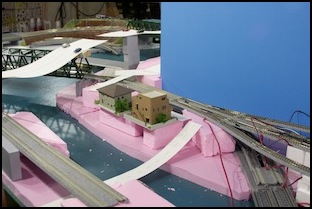
Preliminary visualization test - April 2010
River Bridge
I decided I wanted a better temporary bridge than the cardboard I’d been using as a placeholder until I was ready to build the real bridge. I hit on the idea of using gray-faced foamcore with lines drawn using paint markers.
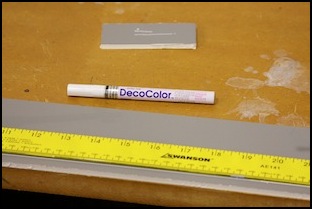
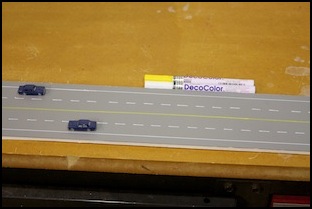
In the two images above, the construction of the bridge is shown. The ruler is used to keep the lines straight, and to let me make consistently-sized dashed centerlines. The road uses 17mm lanes (2.5m, narrower than the standard 3.0m to 3.25m lanes of most highways, and the 3.5m lanes of newer expressways like the Bayshore). A sidewalk runs down each side. Right now the side of the bridge is just exposed foamcore (eventually this will be replaced with something nicer made from styrene, but that’s likely well in the future).
The pens used for this are paint markers, which flow paint to a foam tip when pressed down. They developed a tendency to leak and I ended up using them wearing gloves after getting paint all over my fingers a couple of times. They work, despite a tendency to vary from too little paint to too much, but it isn’t a technique I’d recommend for more than a little work. Oh, and the paint is seriously toxic stuff; this is not something a kid should use, and good ventilation is important. Still, the end result was workable and at the time of this writing is still in use after nearly two years.

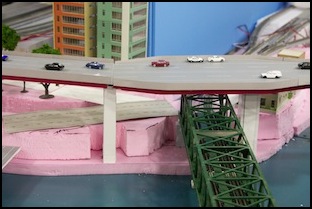
The Temporary Bridge in place
Elevated Expressway
A similar approach was made to create the elevated expressway, both the deck and the supports were initially made from foamcore. This proved problematic, and the supports were replaced with the final support structure a few months later. But the deck remained in use for over a year, until construction of the replacement began as part of the JNS Forum Summer 2011 project party. First supports were made using a simple box structure. Atop that two layers of foamcore 8 cm wide were laid to represent the girders, and a final layer 10cm wide with a gray surface to represent the roadway. Also visible in the right photo below is the tracing paper I used to determine the placement of the supports (first I traced the embankment onto it, then I planned where the road and tracks would cross, and fit the supports in at roughly 8” (200mm) intervals. This also let me determine at what angle the sections had to have their ends cut to fit together.
As an aside, the current temporary expressway was just held together with tape: scotch tape for the vertical supports, and permanent double-sided tape holding the three deck parts (roadway and two “girder” layers) together and attaching sides of gray and red construction paper to provide the feel of support girders and guardrails. The deck itself just rested atop the piers, and could be removed for adjustment. The double-sided tape proved ineffective, and the construction-paper sides fell off after a few months. But before it did it confirmed that I had the right proportions for the look I wanted, and I was eventually to use that knowledge when building the real deck.
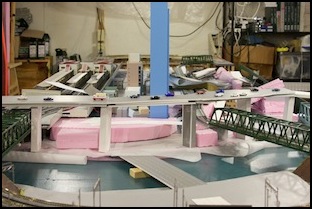
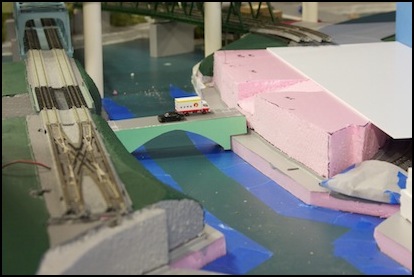
Temporary Expressway and Bridge
Further over, the foam wraps around the end of the commuter line’s bridge, with some houses alongside the canal on the right (mostly out of sight behind the expressway). The red and green buildings help to hide the end of the scenic divider, as well as making the highway look a little lower by sticking up above it. These are modular Kato buildings, increased from six to eight stories to improve their appearance relative to the highway. Unfortunately you have to buy an entire second building to get the two floors to add, so I’m not going to have too many of these, but I can re-use the remaining bits as a four-story tower elsewhere.
Embankment and Road
The avenue from the Urban Station scene needed to climb up the embankment, cross over the subway, and then run down to the bridge. This required carving foam, and building a roof for the subway. Carving foam has been described previously, and this was more of the same. Again Woodland Scenics Foam Putty was used to fill gaps, but it was also used this time to help shape a couple of areas. After construction, the embankment parts were painted with latex housepaint to provide an interim scenic color other than pink. Gray primer was user around the road, and dark green where there would eventually be grass in the part section.
The subway roof was made from 2mm styrene, cut with the scribe-and-snap method. This was a lot of work, and didn’t always come out as well as I’d hoped. It was one of the things that convinced me that I should buy a modelers table saw during construction of the final expressway roadway deck.
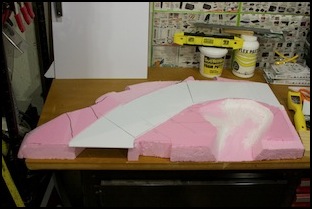
Embankment (Urban Station side, left, and both sides with roof, right) - May 2010
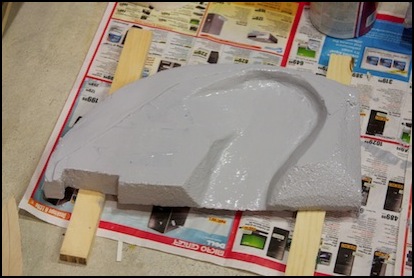
Embankment - painted with latex primer
Canal Bridge
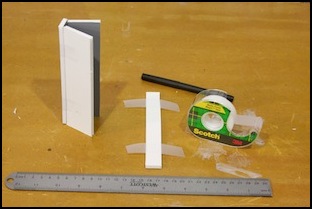
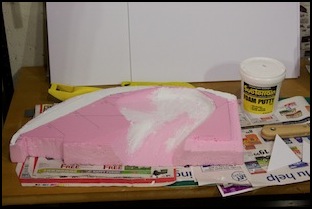
A couple of months later after I’d finished with the embankment and subway roof I made a temporary bridge for the canal. The upper surface is foamcore, with a couple of sides made from cardboard cut from a discarded Kato structure box. This was used for alignment purposes when shaping the hillside (at right) as well as for a visual reference to decide how the road, bridge, and track underpass all looked together. Although mocked up at this point, it would be many months before the end of the River Crossing scene and its subway roof would be completed.
Temporary Canal Bridge June 2010
