


Customizing Buildings III
22 March 2012 23:13 Filed in: Model,Structures
I haven’t been making a lot of progress this week, but I thought I’d post a couple of photos and talk a little about what I’m doing. As usual, larger versions of these photos are available in the Village Photos photo album.
I’d mentioned last time my intent to use photographs for interior detail. This uses the same approach I use for sign-making: reduce images found online to scale size, print them on a 4x6 sheet of glossy photo paper on my inkjet, and glue them to a styrene backing. For the flooring I found some patterns for tatami mats, and assembled room floors by tiling appropriate numbers of mats. Downloadable versions of those were included in last week’s post.
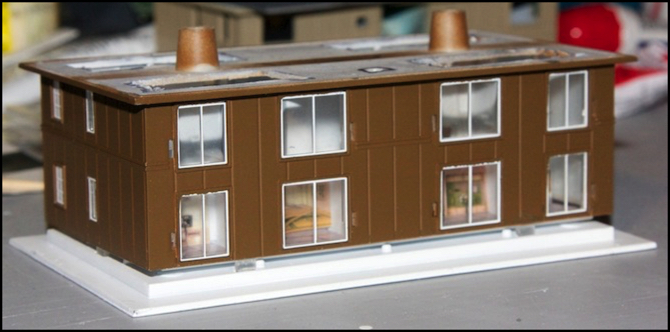
But I’m also using that approach for some of the walls. This is a bit harder, as I need actual photos of walls, but not ones taken at a sharp angle (which is, unfortunately, typical of interior photos). Further, while some furniture is okay, it needs to be subtle, otherwise it’s obvious that the “table” is really a part of the rear wall of the room. With the large windows on the river-facing side of these apartments, the rooms are going to be quite visible (as seen in the test picture above). I ultimately found some usable photos (via Google mainly), but unfortunately they’re all copyrighted, so I can’t share them. Google for “Japan Interior Images” and you’ll turn up a lot of them.
First I needed to build the interior structure of walls and flooring. The floor is 0.015” (0.38mm) styrene, as it doesn’t need to be particularly strong since it’s always supported by something else. The walls are 0.020” (0.5mm) styrene, and to make them stand reliably I used 0.080” (2mm) square styrene bars where they wouldn’t be visible, and small sheets of styrene at the tops of the walls where I could do so without blocking the planned lighting.
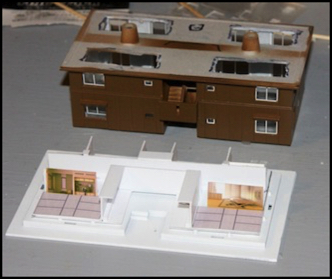
Wall Assembly, with photos
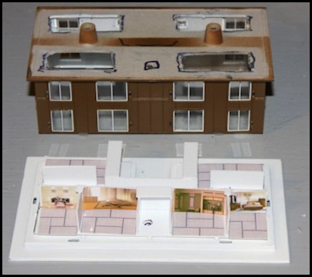
With some flooring and walls printed, and the first floor assembly done, I cut out a few photos and placed them loosely on the assembly to see how they looked. As you can see above, the windows on the entry side of the building are quite small, and only a hint of the interior will be visible (the end is even worse, see the Village photo album for an example). But the other side is a different matter, as you can see in the photo at the top of the page and down below.
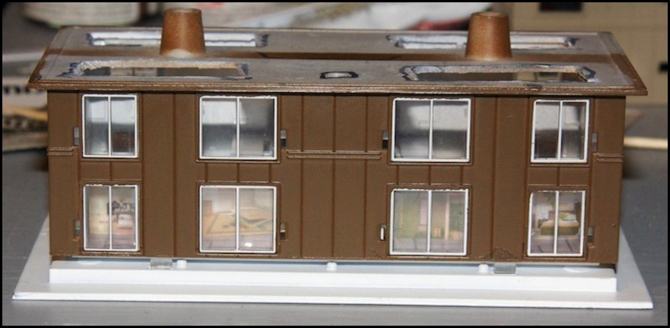
Even without bright interior lighting, the walls will be clearly visible close-up. This is going to make getting these four rooms “right” particularly critical, and also limits how much I can re-use photos here. I really need close to sixteen unique walls across the two buildings, and I’ve only found about a third of that so far. I may block a few off so they appear unlit, and just paint the back walls some neutral color (the flooring will still be visible near the window, but otherwise the room would be dark). I could also add some curtains made from tissue paper or similar, and that’s an option as well. There are a couple of smaller, non-detailed corridors and very small rooms, which will be painted black so even with lighting nothing will show through the windows
But these tests confirm I’m on the right track, and I’ve sized things appropriately. I need to make the other three floor assemblies, and paint them. Then I can glue in final photos, maybe install some furniture (beds in bedrooms, maybe a couch or table somewhere) and a few figures of people. It will probably be a couple more weeks while I putter along, but I’m not really in a hurry.