


How Not to Make Backdrops
29 December 2010 23:58 Filed in: Construction,Errors
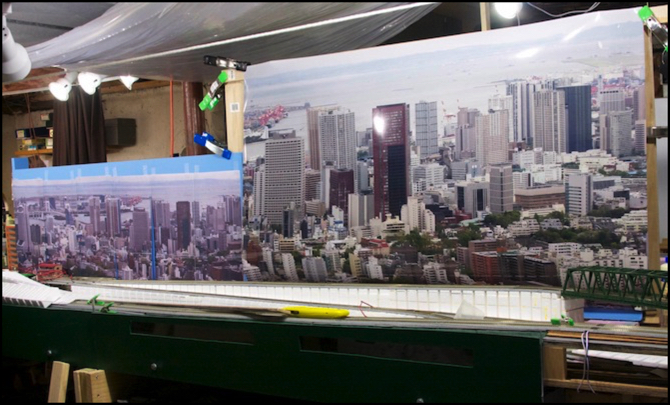
I bow to no one in my ability to screw up a simple task. Complex tasks, no trouble, but the bleedingly obvious escapes me every time. Case in point, the backdrop photo on the right above, which you’ll note is nearly a foot higher than the backdrop it’s supposed to be attached to. There’s a story here.
Last summer, I found some photos on Flickr that I was going to use for my backdrops, to avoid having a simple blue backdrop, and to give the foreground a feeling of being placed in the the city, not just some track with a few buildings around it. The backdrop on the River Crossing scene was made using individual sheets of presentation paper from a laser printer, and glued up with spray-on photo glue. This was written up in the July Status musing. Although I like the photo, I’m less fond of the method I used, as it was a lot of work and the end result was rather poor: the seams between sheets of paper are quite obvious, and it turns out that this kind of glue doesn’t work well on painted wood, so some of the sheets are starting to peel off. The presentation paper was also less than photo-quality, and coupled with the low resolution of the image I used, this made things look a bit muddy. I’m going to have to re-do this eventually.
So for my Riverside Station scene, I decided to use a professionally printed large-size photo on each backdrop. These aren’t cheap (a bit over $100 each in the size I want), but you only pay for the actual image size and it’s done on a photo-grade inkjet printer on heavyweight glossy photo paper, which makes it look much better.
I had found four photos, which could be stitched together to make two separate panoramas using Photoshop Elements. I could also use photoshop to resize these, interpolating pixels between the real ones to keep the dpi acceptably high for close viewing (only about 150 dpi, still much less than a small print, and less than the 300 dpi you’d usually want for a reasonable enlargement, but better than what I did on the River Crossing scene). Even though the two photos wouldn’t match where they met in the middle of the scene, that was my original plan, and I printed a paper copy of the left photo and taped it up so I could see how it looked.
Time passed as I worked on other projects, and the idea of two mismatched backdrops nagged at me. Things like that are one of the reasons I do mock ups and leave them in place for an extended period; it takes me time to decide if I like an idea or not. Last month, I decided that I had enough pixels that I could take one of the two panoramas, widen it, and split it down the middle, using it for both halves of the 8’ long scene. I’ll likely use the other on the Urban Station scene.
I made this version, and removed a bunch of excess sky at the top to get the image down to a smaller size. I think at the time I realized that I needed to do more, as the image was still 29” tall, and my backdrops were smaller (for some reason I thought they were 24”, which is the size of the one I used on the River Crossing scene, but these were older ones I’d had cut from a 4’ x 8’ sheet, so I’d made them 18” tall). I’d planned to cut a few inches off the bottom, either in Photoshop or after gluing them up, but other work intervened and I forgot all of that. And I never checked my (mistaken) assumption about the backdrop height.
Moral: “Measure twice, cut once” isn’t just for carpentry.
This week, I finally needed to get them printed, as I was taking the tables apart so I could work on the risers at the back (glue, plaster cloth, and paint; all things much better done with the table flipped around so I could work from the back). Yesterday evening I checked my images by eye one last time, saved them to a CD, and dashed off to the print shop. You’ll note the absence of a “compare size to actual backdrop” step here, too. A few hours later I was home, $230 poorer, took out the first photo, unrolled it and held it up to the backdrop, and said “uh oh” (actually what I said was quite a bit stronger, but I’ll spare you the details).
At that point I could have started over, writing off the expense as the cost of my own folly. But that would leave me with a disassembled table and no photo for it (or going back to the “two different photos” plan). Instead, I made a small frame of scrap lumber and clamps, and attached one of the photos to it, to see what it would look like if the backdrop was 29” tall, or if I cut off various amounts of the lower portion. That’s the right side of the photo at the top of this page.
What I saw comparing the small size original photo (left) and the new photo (right) was that I liked the size of the foreground buildings more in the new photo, and that I really needed the foreground portion to create a sense of space between the layout scene and the towers. The downside is that the towers are huge, particularly when standing right at the front of the table. They really dominate the scene, perhaps too much. On the other hand, I want the railroad to be “in” the city, and in large cities the skyscrapers do dominate the scenery, even if you aren’t adjacent to them.
After mulling things over for a few hours and sleeping on it, I decided to go for it, and began adding about a foot to the backdrops (the lower two inches are hidden by the track risers, so the exposed backdrop will be a bit less than 28”). At worst, I’ll decide I don’t like it, and need to re-do the backdrops again at some future time. Oh, and while I was at it, I bought the materials to do the same for the Urban Station scene, so I won’t be looking at the back of the new backdrop from there, and so I can use the other panorama for that scene.
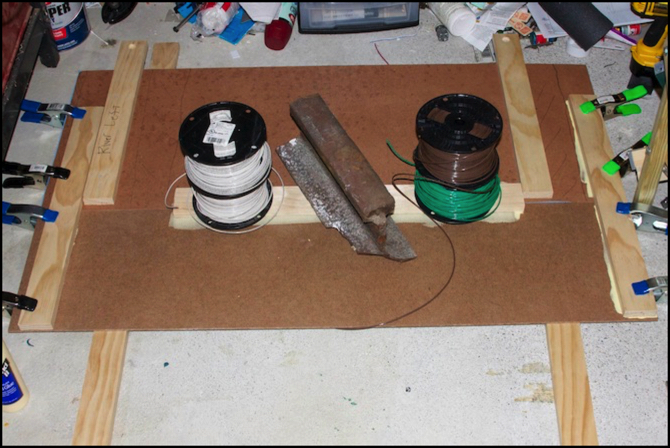
Backdrop extension being glued in place
Adding the extension was simple, as shown above. Two 1x3 boards glued to the original and new piece, and a third glued along the seam to keep them from separating. Spackle will fill the slight gap on the front where they meet, and since the photo is going to cover the whole thing I don’t need to paint the new part blue (but I will prime it, if only to keep the glue from soaking into the front too quickly).
The glue sets in a couple of hours, and I’ll remove the clamps after that. But I’ll let the glue set up for 24 hours to get a full cure before doing anything strenuous with it, although I’ll probably flip the panel over and spackle/paint the front to smooth and seal it while that’s happening.
Once all that dries (probably sometime next week; even primer takes several days to really dry out throughly) I’ll attach the photos and reassemble the backdrops. Meanwhile, I’ll be working on the track risers. I already started gluing those down last week, but there are a lot of them and I can only do a few at a time due to the number of heavy objects I have suitable for clamping.
I’d hoped to have the layout reassembled before the end of the year. That’s not happening, but hopefully by the second week of January I’ll have it all reassembled. I’ll still need to do electrical work on the commuter line then, but I should have the Subway and Shinkansen/Express lines fully operational while that’s going on.
Other website updates:
- Added photos to the Construction photo album.
- Added text and photos to the Phase2j Construction page.
- Added an entry for Mod Podge to the Material Safety page (it’s as safe as any other PVA glue).
- Rearranged the Backdrop Photos page to reflect current usage of the photos.
- I also did a bit of cleanup of the Scenery index page and the matching entries on the Prototype page.
